Thursday, September 8, 2011

Anatomy of a treadle wheel.

I've spent a bit of time the last couple of days doing a little work on the treadle wheel. The wheel has performed flawlessly except for 2 minor problems. The corners that sit up against the inside of my legs tend to dig in after awhile, a towel in the lap solves this issue. The second problem is that the wheelhead oscillated just a bit, almost a 1/8". That means 1/8 high on one side, 1/8 low on the other. Over the width of the wheelhead that is almost a 1/4" difference. Hasn't made a difference with the skinnier items but with pieces like dinner plates I've had to compensate and trim the feet flat. Not a huge deal but I figured it was time to fix it.

Here is the treadle with most of its important bits removed. I'm thinking of redoing the seat, going for more of a tractor style seat...like the old randall kick wheels. Way more comfy. I gave the wheel a good wipe down, it needed it.


The tray and flywheel awaiting their sponge bath.


So this is where the problem was with the old wheelhead: This wheelhead and the tapered shaft were salvaged from an old kickwheel that was given to me years ago. The head fits onto a shaft with a morse taper, good design but the original shaft wasn't long enough for the treadle so I cut the tapered part off and attempted to weld it to a new shaft. Herein lies the problem: two pieces of shaft welded together are never going to have the precision of a milled one piece shaft. Hence the oscillation. I gave it another go yesterday with a new shaft but even if it's perfectly lined up the welding causes enough tension to move it just a hair. Just a hair on a 1" shaft is about 1/8" over a 12" wheelhead. So I broke down and bought a new wheelhead that would mount to a 1" shaft with set screws, no taper.

Why did I like the tapered shaft so much? It's keyed into this collar for easy removal. No set screws, just lift. Brilliant. I'll try to incorporate this into the new one but I don't think it will work white as magnificently.

Here is the old shaft and the new. The old one was pretty junky looking, the plates were cut from scrap and pretty sloppy. I'm a decent welder and cutter, but the schools cutting torch is subpar. Somehow in the fabrication of the original the shafts ended up not being parallel to eachother, not a huge deal but it does cause irregular wear to the swivel joint that connects the shaft to the kick bar. I bought all new steel for the new one, I wanted one that had a little bit nicer look to it. I may give it a paint job as well. Very few people ever see the wheel up close and could probably care less but...craftsmanship and pride in your work are two things that I believe very strongly in. It doesn't matter if anyone else sees it, I see it. Here's a blast from the past with my views on this matter.

The bottom bearing, mortised into the bottom rail. That's right, mortised. Attention to detail, the flywheel rides about 1/2" above the bottom rail. It looks slick.

After cleaning out the tray I noticed these two little problem areas where the varnish is failing.  I'll give it a good cleaning, sanding and re-varnish.  I've got a few days until the new wheelhead comes in anyways. I used a marine varnish initially, I think I'll use it again and maybe apply more coats this time around.  Overall though I'm pleased with how it has held up.


Cheers!

Monday, September 5, 2011

Process.

Here are a few photos of how I process my "free" local materials. Free money-wise, expensive in labor. I'm currently processing a bunch of red clay, but the same process goes for the ash. Fortunately the granite I obtain is already a fine powder and needs no further processing. I use a wet-sieving process that doubles as washing for the wood ash. For the clay it keeps the dust down and keeps me from losing fine particles as dust. It takes 2 barrels/buckets of equal size and various sized sieves.
I start by filling a barrel 1/3-1/2 full of material. For red clay I just cover material with water, for ash I fill the whole barrel. I let the clay sit overnight and then mix it into a slurry with a drill-mixer. For the ash I stir it up and sieve out the charcoal lumps and let it sit overnight. The next day the ash will have settled and I'll pour off the excess water. From here on the process is the same.

The first sieve is an old kitchen sieve...probably like 8-10 mesh, on top of a clean, empty barrel. Fill the sieve about halfway and shake as much through as possible.


I use a hose nozzle set on shower to force the rest through the sieve. This is why you only fill the bucket halfway...the rest will fill with water that will be poured off after it settles. This is beneficial for the ash washing, just waste water for the red clay.


The remnants. Wash, rinse, repeat. Rinse out the barrel when finished and sieve back into that one the next day. The ash needs 5-6 hours minimum to settle, the red clay settles much faster. I prefer to just do it once a day though, easier for me. I start with a kitchen sieve, then 30 mesh, 50, 60, 80. After I'm done sieving I'll let it settle, pour off the excess water and pour it into sheets in my drying racks.


The ash barrel. The paddle is for mixing...and irreverent students. You don't wanna touch this stuff, I wear rubber kitchen gloves.

Cheers!

Thursday, September 1, 2011

True grit.

I just finished my evening class and thought I'd shoot off a quick post.
I mixed up a small batch of my clay with 10% 30 mesh sand in it, I wanted to see what it was like. I love the texture that's left after trimming and the slips do some awesome stuff over it but it's a hard sell...hard on the hands too.


True Grit.


Some deco'd bowls. 25#ers.


Some pitchers with a copper green that I haven't used in years.


Every room and studio in our art bldg has a regulator and hookup for our larger compressor that hasn't worked in years. I removed mine because it was in the way of my shelves and wouldn't you know it the sculpture professor tried to fix it. Damn, look at all that rusty water that was in the system. I should've taken a shot of the floor too. An excuse to clean I suppose...and cap the pipe.


That's all for now.
Cheers!

Friday, August 19, 2011

52 x 6

A productive day...looks like I'll be chasing plastic for awhile. I also have some large bowls and large baking dishes waiting under plastic. A wood firing is on the horizon.

Cheers!

Monday, August 15, 2011

Studio Shots.

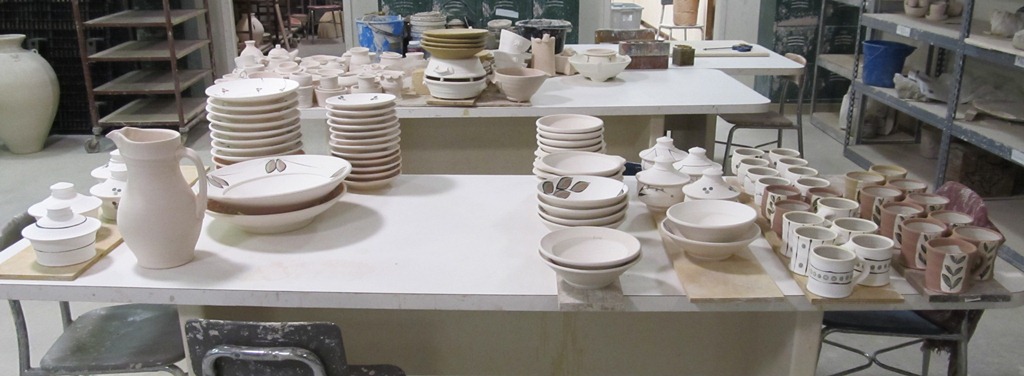
Not much to say...I've been trucking away in the studio, working towards a firing in the next few weeks. Here are a few shots of what's happening right now.

Baking dishes awaiting a little trimming and handles.

Baking dishes handled and slipped.

Deco'd pots.
Jugs awaiting handles.


A couple little bottles from the last wood firing.

Starting to pile up for the next firing.

35 Ash
50 Granite Dust
15 Red Clay
Completely Craze-Free. Crazy.
Cheers!

Sunday, July 10, 2011

Summer report #2

Here are the results of the triaxial blend. I'm pretty happy with it, as I suspected though there aren't any usable glazes(to my liking anyways.) There are several that I'll use as a base for further tests. I wasn't too surprised about what the results looked like, I am surprised about the raw materials alone. The red clay has what I guess is a very high shrinkage(useful for raw glazing!), the granite kinda looks like poorly fire malcolm davis shino on stoneware and the ash...


The ash is completely unmelted. It looks like velvet and I can easily dust it off the test piece. I use mesquite ash, which is a very hard wood and generally speaking the harder/denser the wood the more refractory the ash. I also wash my ash which according to Phil Rogers rinses away about 25% of the fluxes. I learned early on that mesquite ash used unwashed has a shelf life of about 3-4 weeks. My glossy green ash glaze will go matte mustard yellow over time, weird right? So I wash all of my ash. To keep it consistent I wash several batches, enough to last 2 or more years and then sort of dry mix it all which leaves me with one large source that will be consistent from one batch to the next. This means that I don't have to test my material before I mix each batch of glaze. I will do the same with the granite and red clay. Back to this ash...it behaves like other ashes when mixed in 50/50 of 4/4/2 blends which leaves me to believe that the ash is just lacking something on its own to melt and is in fact not too refractory.


I had to make a modification to my blunger by adding pulleys and a v-belt. The motor is 1725 rpms which is much too fast for mixing. These pulleys bring it down to about 400 rpm. I mixed up my first batch a few days ago and it works great. I'm excited to ease some of the strain from my back.


Cheers!

Sunday, July 3, 2011

My summer report.

Not much happening around here. I haven't made any pots in a couple weeks but I did fire the salt kiln with a bunch of pots from my new clay body. I didn't snap a photo but the results were good. No cracking, before I was having all kinds of cracking with backfilled handles and inside footrings(not s-cracks,) and less warpage with plates. The pots also have a higher ring and feel more dense, though I'll have to fire a test in the redux kiln to confirm that.

Just for kicks I ran a triaxial blend with wood ash, local red clay and granite dust. These are 3 materials I can obtain in abundance for free so I thought I'd see what I can do with them. I've used wood ash regularly for years, I use a bit of red clay in one of my glazes and have never used the granite. I'm not expecting to obtain a usable glaze from this test(though that would be ok) but rather I want to see how these materials interact with each other. So we'll see what happens.


I've also spent some time building a blunging blung-o-matic blunger(patent pending.) It has a mounted motor with mixing shaft and a pump so I don't have to get the slip out by hand. It works well with water...the pump is going to be the weak link...I don't know how well it will handle the slip. I'll let you know in a couple of days.


Happy 4th!


Cheers!